How to setup python environment for Machine Learning with Anaconda (Part 3 of 6)
Now that you have done and dusted with the introduction to machine learning, Its time to take a deep dive ! After completing this tutorial, you will have a working Python environment to begin learning, practicing, and developing machine learning programs. This tutorial is built for windows, thought the mac instructions and screens are pretty much identical.
We are going to:
In this tutorial, we will cover the following steps:
- Download and Install Anaconda
- Start and Update Anaconda
- Update scikit-learn Library
1. Download and Install Anaconda
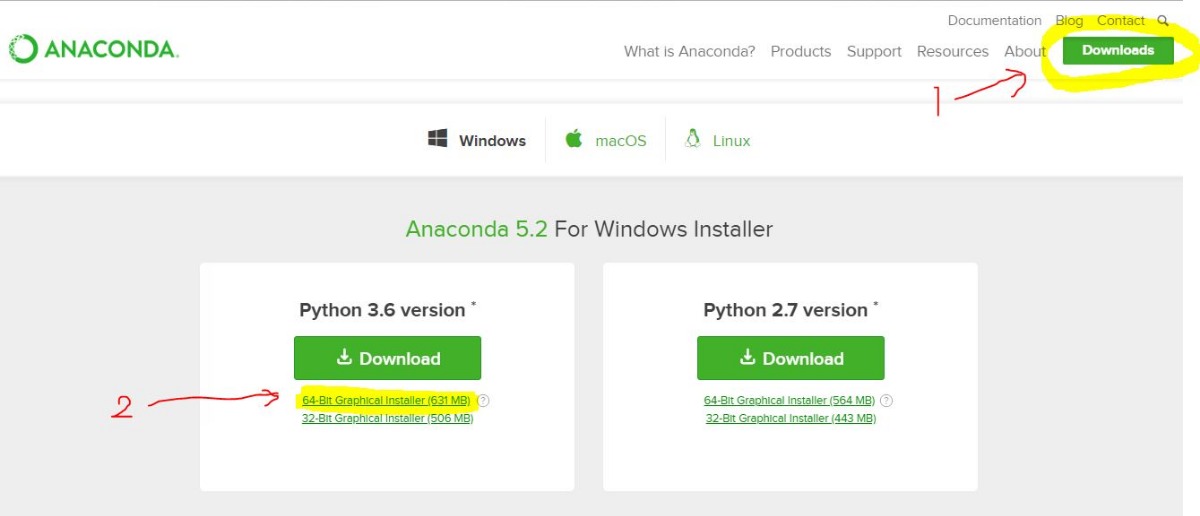
- Visit the anaconda downloads page Click-here

- Download the 64bit version (around 650mb in size and takes 3 GB of space for installation)
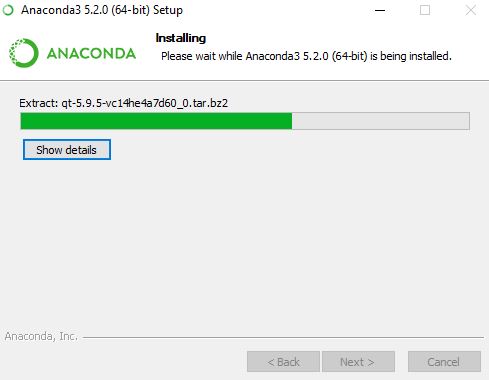
- Once the download is complete, double click the exe file to begin the installation wizard.
- Leave the installation defaults and click on Next to finish the installation

- The installation may take 15 minutes to complete
2.Start and Update Anaconda
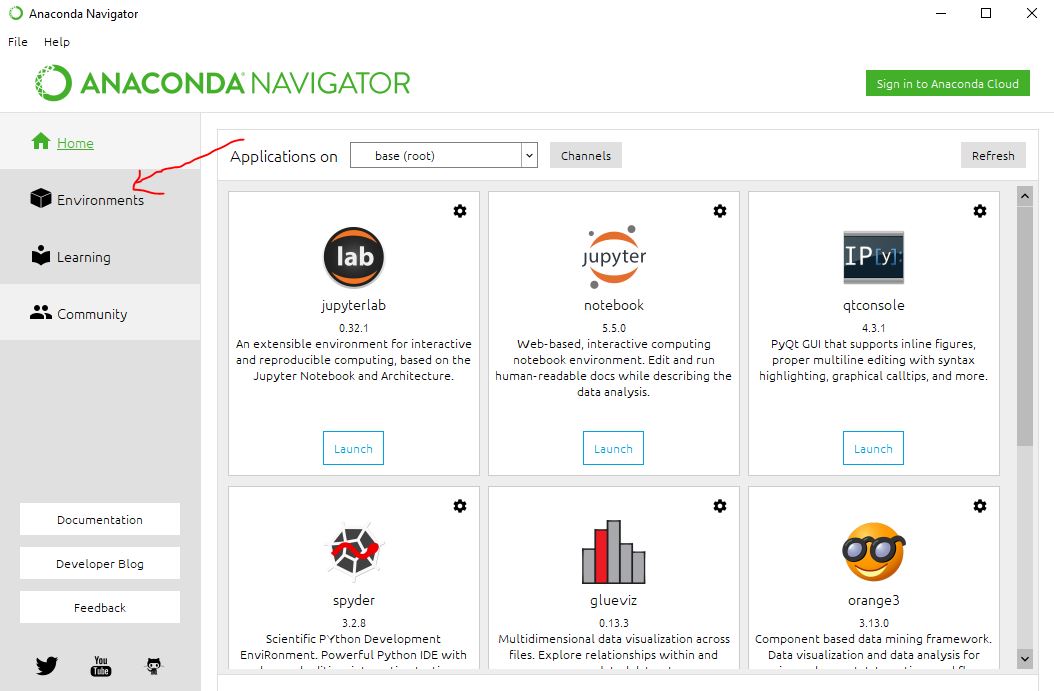
Now that the installation is complete, let us open-up the program. Look for "anaconda navigator" in all programs and click on it
Once the program opens, Look for Environments and click on it

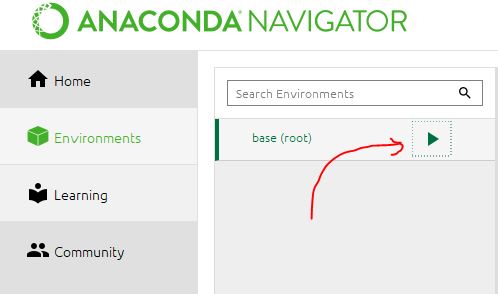
Click on the "play icon" and click again on "Open Terminal" from the drop down to open up the terminal

Once the terminal is open
- Verify python is installed and has the latest version by typing the below command:
python -V
- Verify conda is installed properly and has the latest version
conda -V
Your output should look like the below (The versions might differ)

Now lets update the environment:
conda update condaconda update anaconda
- Lets verify is the scipy environment is setup properly. Copy paste the below command to start the python
python
- Once done copy paste the below commands to check the versions
# scipy
import scipy
print('scipy: %s' % scipy.__version__)
# numpy
import numpy
print('numpy: %s' % numpy.__version__)
# matplotlib
import matplotlib
print('matplotlib: %s' % matplotlib.__version__)
# pandas
import pandas
print('pandas: %s' % pandas.__version__)
# statsmodels
import statsmodels
print('statsmodels: %s' % statsmodels.__version__)
# scikit-learn
import sklearn
print('sklearn: %s' % sklearn.__version__)
You should see something like this (Vesions might differ)
scipy: 1.1.0
numpy: 1.14.3
matplotlib: 2.2.2
pandas: 0.23.0
statsmodels: 0.9.0
sklearn: 0.19.1
Good job so far, This brings us to the last part of this tutorial.
3. Update scikit-learn Library
Copy paste the below command and follow the prompts to update the scikit libraries
conda update scikit-learn
Wrapping up !
Good Job !, you now have a working Python development environment for machine learning and deep learning. Now the possibilities are endless. Hang on. Move on to the next tutorial to kick start your very first machine learning program !
Next step: First end to end project in machine learning with python
Share your thought in the comments. And share your knowledge with others in the copycoding community
nVector
posted onEnjoy great content like this and a lot more !
Signup for a free account to write a post / comment / upvote posts. Its simple and takes less than 5 seconds
Post Comment